 Save
Save My neighbor showed up with a bag of apples from her orchard one crisp September afternoon, and I stood there staring at them, wondering what to do beyond the usual pie routine. Then it hit me—what if I took everything I loved about s'mores and gave it to apples instead? The result was these chocolate-dipped slices with their crackling graham cracker coating and marshmallow ribbons, and suddenly that pile of fruit became something my kids actually wanted to eat for dessert.
I made these for my daughter's after-school group last month, and watching a bunch of ten-year-olds' eyes light up when they bit into the crispy graham cracker shell and hit that soft, juicy apple center was pure magic. One kid asked if we could make them every single week, which felt like the highest compliment I've ever received in my kitchen.
Ingredients
- 2 large crisp apples (such as Granny Smith or Honeycrisp): The tartness cuts through the chocolate beautifully, and you want apples firm enough to hold up when dipped—avoid anything soft or mealy.
- 120 g (4 oz) semi-sweet chocolate chips or chopped chocolate: This amount coats without drowning the apples, and semi-sweet hits that sweet-but-not-cloying spot that makes people come back for more.
- 1 tsp coconut oil (optional, for smoother melting): A tiny bit thins the chocolate just enough to coat evenly without seizing, though honestly you can skip it if you're patient with your stirring.
- 60 g (½ cup) graham cracker crumbs: Pulse whole graham crackers in a food processor to get uneven crumbs—the mix of fine dust and chunky bits is what gives you texture.
- 60 g (½ cup) mini marshmallows or marshmallow fluff: Mini marshmallows stay visible and toasted-looking, while fluff gets you those gooey drizzles that scream s'mores.
- 2 tbsp chopped toasted nuts (e.g., pecans, peanuts) - optional: Toast them yourself for five minutes in a dry pan to wake up their flavor—store-bought toasted nuts don't have the same punch.
- Flaky sea salt, for garnish: Just a whisper of it transforms these from simple dipped apples into something with real sophistication.
Tired of Takeout? 🥡
Get 10 meals you can make faster than delivery arrives. Seriously.
One email. No spam. Unsubscribe anytime.
Instructions
- Set yourself up for success:
- Line your baking sheet with parchment paper so cleanup is effortless and nothing sticks. This is one of those tiny steps that feels unnecessary until you're standing at the sink covered in chocolate, then you'll wish you'd done it.
- Prepare your apples with care:
- Wash, dry, and slice each apple into four thick rounds, removing the seeds and core from each one—I use a small paring knife and scoop out the center like you're coring a tomato. Pat them completely dry with paper towels because any moisture will make your chocolate seize up and look chalky.
- Melt your chocolate gently:
- If using a microwave, heat in 30-second bursts and stir between each one—chocolate can go from silky to scorched in seconds. A double boiler is slower but nearly foolproof; just keep the bottom bowl's water at a gentle simmer and let the heat work its magic.
- Dip with confidence:
- Hold each apple slice and dip it halfway into the chocolate, tilting it slightly so excess falls away. The motion should feel relaxed, like you're introducing the apple to the chocolate at a dinner party, not dunking it like you're in a hurry.
- Coat while the chocolate is still warm:
- Right after dipping, press or sprinkle your graham cracker crumbs onto the chocolate side—if you wait even a minute, the chocolate starts setting and the crumbs won't stick. This is the moment where you see the magic happen.
- Get creative with toppings:
- If you're using fluff, microwave it just 10 to 15 seconds to soften it, then drizzle over each slice with a spoon or small piping bag. For mini marshmallows, press a few onto the still-wet chocolate so they nestle in and stay put.
- Set and serve:
- Refrigerate for 10 minutes so the chocolate firms up and everything bonds together. Eat them within a few hours while the apples are still crisp and the contrasts feel real.
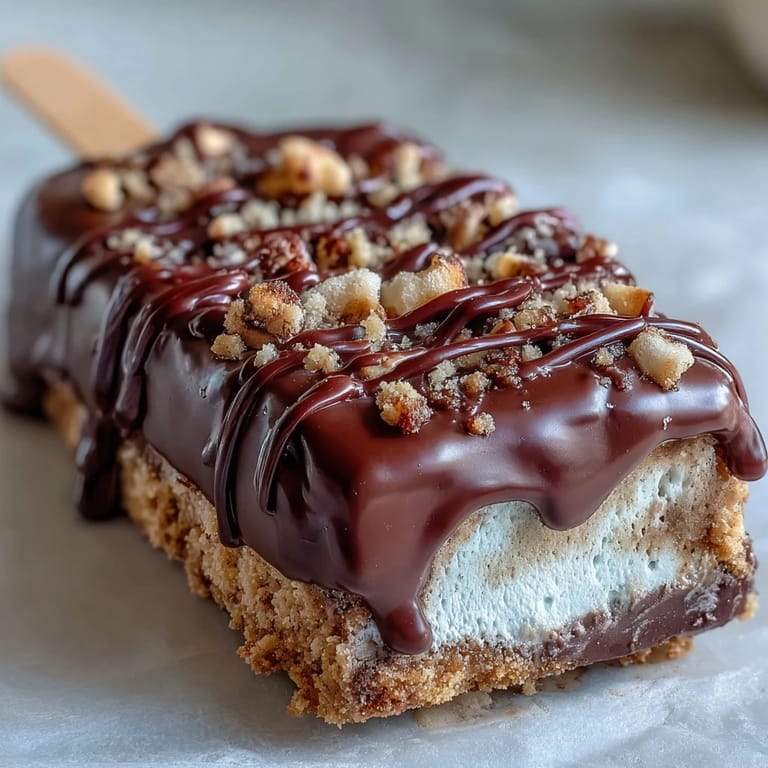
 Pin it
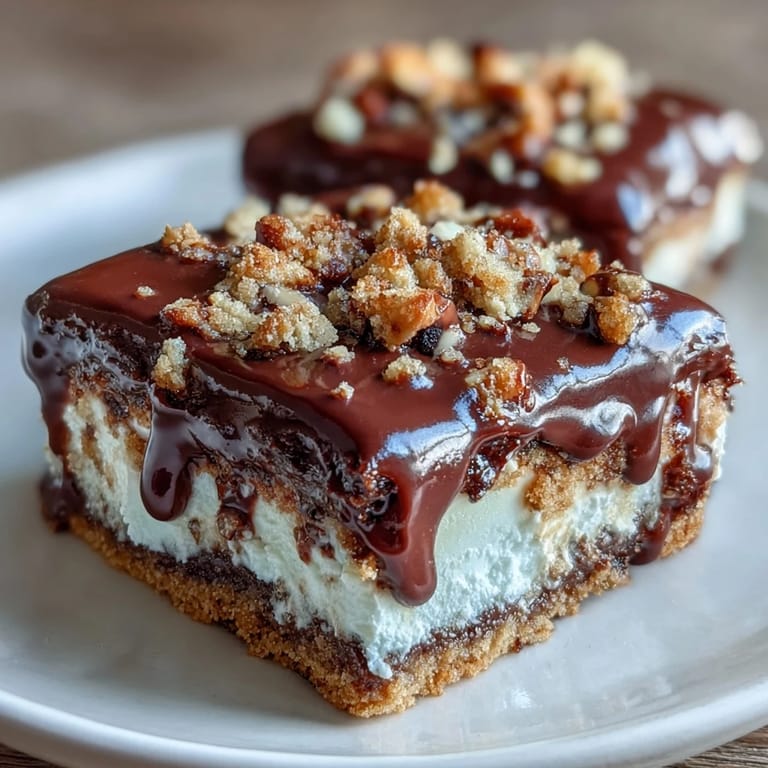
 There's something almost ceremonial about biting into one of these and hearing that little crunch of graham cracker before the chocolate gives way to the cool, sweet apple inside. It reminds me why I cook in the first place—not for complicated techniques, but for those small moments of texture and surprise that make people smile.
Why These Beat Regular S'mores
Listen, campfire s'mores are great, but they're messy, you inevitably drop one in the dirt, and half the marshmallow ends up on your face instead of in your mouth. These apple slices give you all the same flavors—toasted marshmallow, chocolate, and that slightly salty-sweet cracker taste—but in a neat, hand-held format that you can actually eat while sitting down or walking around. The apple adds brightness that cuts through the richness of chocolate and marshmallow in a way burnt graham crackers never could.
Make Them Your Own
The formula here is solid, but it's also your playground. Try dark chocolate if you want something more sophisticated, or milk chocolate if you're feeding people with a sweet tooth that could rival mine. White chocolate works beautifully too, and feels almost elegant if you drizzle it with a little dark chocolate on top. I've mixed crushed pretzels into the graham cracker crumbs for salty crunch, pressed toasted coconut flakes over the chocolate before the crumbs set, and even sprinkled crushed waffle cookies for an unexpected twist.
Storage and Timing Tips
These are best eaten the same day you make them, while everything is still snappy and defined. If you need to keep them longer than a few hours, store them in the refrigerator in an airtight container with parchment between layers, but know that the apples will slowly release juice and soften the chocolate coating over time. You can absolutely prep the apples and chocolate the night before, then assemble everything fresh the next day—just keep the apples in a bowl of water with a squeeze of lemon juice to prevent browning.
- If the chocolate hardens too much before you finish dipping, microwave it for 10 seconds to loosen it back up.
- Invest in a good sharp knife for slicing apples cleanly—a dull blade will bruise the flesh and create watery spots.
- Have all your toppings prepped and within arm's reach before you start melting chocolate, because once you begin dipping, everything moves fast.
 Pin it
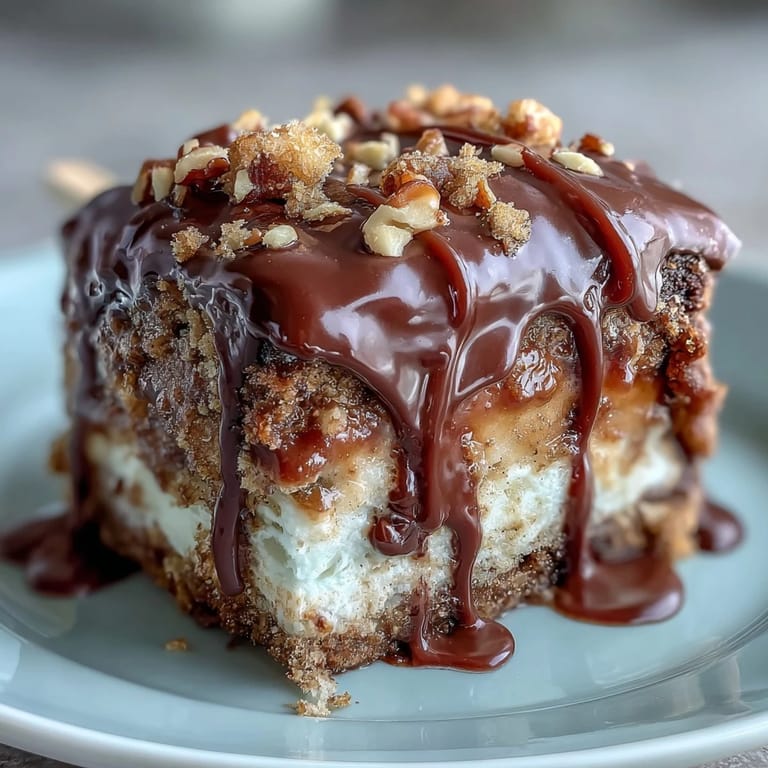
 These slices sit in that sweet spot between indulgent and almost-healthy, which means you can offer them at book club and feel genuinely proud. Make a batch this weekend and watch what happens.
Frequently Asked Questions
- → What type of apples work best?
Crisp varieties like Granny Smith or Honeycrisp provide a nice tartness and sturdy texture that hold well when sliced and dipped.
- → How can I melt the chocolate smoothly?
Melt chocolate chips with a bit of coconut oil in 30-second microwave bursts or over a double boiler, stirring until silky smooth.
- → Can I prepare these ahead of time?
It's best to serve soon after chilling the coated slices to maintain crispness, as apples may release juice if stored too long.
- → What alternatives can I use for marshmallow topping?
Mini marshmallows can be pressed onto chocolate while still wet or use softened marshmallow fluff drizzled over each slice for gooey effect.
- → Are there optional toppings to enhance flavor?
Toasted nuts like pecans add crunch, and a pinch of flaky sea salt enhances the sweet and savory contrast.