 Save
Save The first time I made this dump cake, I was running late for a potluck and threw everything together in about seven minutes flat. My friend Sarah kept eyeing the pan suspiciously until she took her first bite and literally stopped mid conversation. Now it's the most requested dessert at every gathering, and nobody believes how little effort actually goes into it.
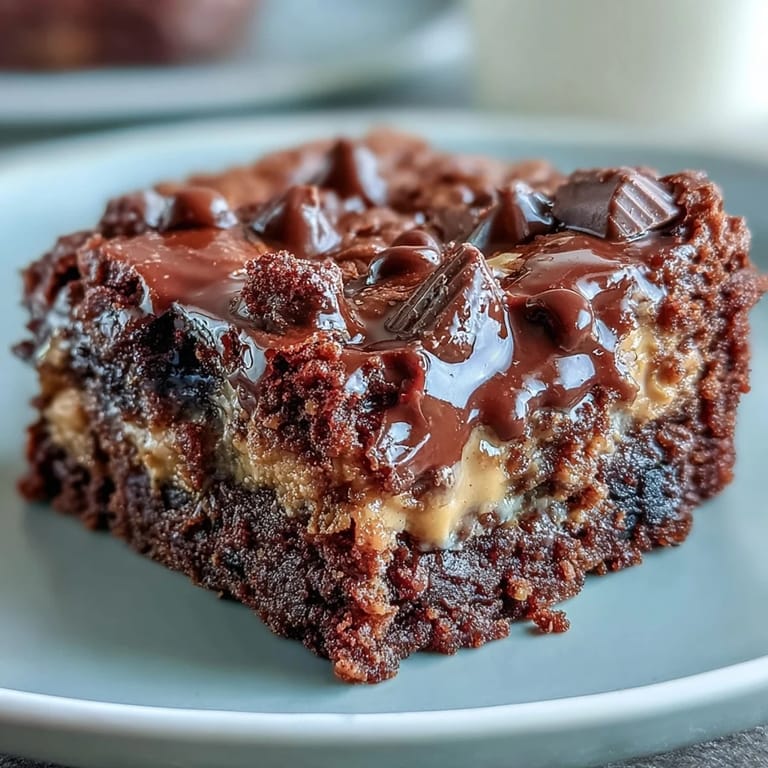
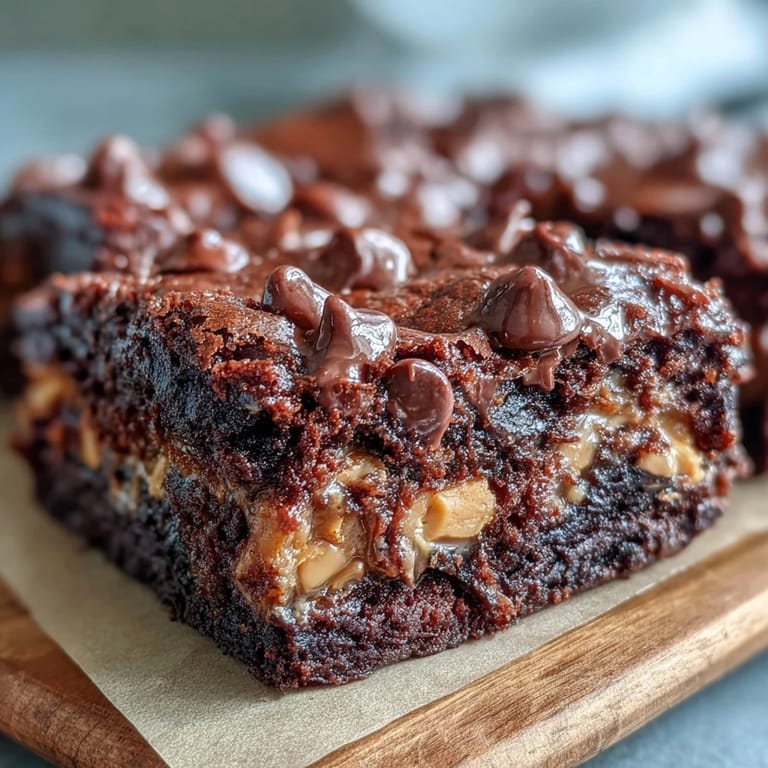
I made this for my dads birthday last winter when he was craving something chocolate but I was too exhausted to attempt a layer cake from scratch. He took one bite, closed his eyes, and declared it better than any restaurant dessert hed ever had. The best part was that I spent more time unwrapping the peanut butter cups than actually mixing the batter.
Ingredients
- Devils food chocolate cake mix: Use whatever brand is on sale, but make sure its the standard 15.25 ounce size
- Creamy peanut butter: Room temperature spreads so much easier over the bottom of the pan
- Unsalted butter, melted: Salted butter works too but you might want to reduce the salt elsewhere
- Whole milk: Ive used skim and almond milk in a pinch, but whole milk gives the tenderest crumb
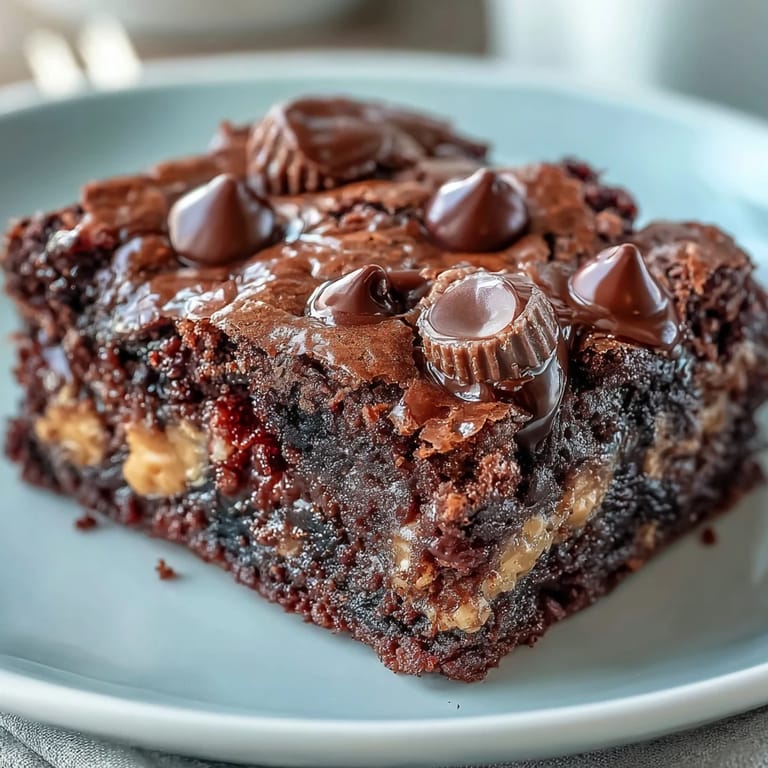
- Mini peanut butter cups: The unwrapped ones save time, but regular ones chopped up work perfectly
- Semi sweet chocolate chips: Milk chocolate makes it sweeter while dark chocolate balances the richness
Tired of Takeout? 🥡
Get 10 meals you can make faster than delivery arrives. Seriously.
One email. No spam. Unsubscribe anytime.
Instructions
- Preheat your oven:
- Get it to 350 degrees and grab a 9 by 13 inch baking dish, giving it a quick spray with nonstick cooking spray or rubbing it with butter
- Spread the peanut butter:
- Drop spoonfuls of room temperature peanut butter across the bottom of the pan and use the back of the spoon to spread it into an even layer
- Whisk the batter:
- In a large bowl, dump the cake mix, melted butter, and milk together, whisking just until combined because tiny lumps will disappear in the oven
- Layer it up:
- Pour the chocolate batter right over that peanut butter layer, smoothing it gently with a spatula so its even
- Add the toppings:
- Scatter the mini peanut butter cups and chocolate chips across the top, pressing them slightly into the batter so they dont roll off
- Bake until set:
- Slide it into the oven for 35 to 40 minutes, checking for doneness when a toothpick comes out with moist crumbs rather than wet batter
- Wait before serving:
- Let it rest for at least 15 minutes so it sets up properly, though patience is hard when your kitchen smells like a chocolate factory
 Pin it
 My cousin served this at her dinner party and watched her usually picky eater nephew go back for thirds. Thats when she realized that sometimes the simplest desserts are the ones people remember most fondly.
Making It Your Own
Ive started sprinkling chopped salted peanuts on top during the last five minutes of baking for this amazing salty crunch that cuts through all the sweetness. A friend of mine swaps the peanut butter cups for chopped Reese's eggs around Easter time, and honestly, that might be even better than the original.
Serving Suggestions
Vanilla ice cream melting over a warm square of this cake is pretty much perfection. When I want to feel fancy, I drizzle a little salted caramel on top and watch peoples eyes light up like Ive done something complicated.
Storage Secrets
This cake actually develops more flavor on day two, so feel free to make it the night before your event. The texture becomes fudgier as it sits and the peanut butter flavor intensifies beautifully.
- Keep it covered at room temperature for up to two days if your house isnt too warm
- Refrigerate any leftovers beyond that, but bring it to room temperature before serving
- Freeze individual portions wrapped tightly for those emergency dessert cravings
 Pin it
 Theres something so satisfying about a dessert that looks impressive but requires almost zero effort. This cake has saved me more times than I care to admit.
Frequently Asked Questions
- → Can I use natural peanut butter instead of creamy?
Natural peanut butter can work, but creamy processed peanut butter yields the best results. Natural varieties tend to separate and may create a thinner layer. If using natural, make sure to stir thoroughly and consider reducing the milk slightly to maintain the proper consistency.
- → Why is it called a dump cake?
The term refers to the simple preparation method where ingredients are layered or dumped into the baking dish without complex mixing techniques. This dessert lives up to the name—you simply spread the peanut butter, whisk together the cake batter, pour it over, and scatter the toppings on top.
- → Can I make this ahead of time?
Absolutely. The cake can be baked up to a day in advance and stored covered at room temperature. It actually tastes even better the next day as the flavors meld together. Warm individual slices in the microwave for 15-20 seconds if you prefer that freshly baked gooey texture.
- → What's the best way to serve this?
Warm is ideal—the peanut butter layer becomes irresistibly gooey and the chocolate chips stay melted. A scoop of vanilla ice cream creates the perfect temperature contrast and cuts through the richness. For cleaner presentation, let cool completely before slicing, then warm individual portions.
- → Can I freeze this dump cake?
Yes, it freezes well. Bake and cool completely, then wrap tightly in plastic and foil for up to 3 months. Thaw overnight at room temperature before serving. Note that the texture may be slightly less gooey after freezing, but a quick warm-up in the oven or microwave helps restore that luscious consistency.
- → Can I use a different cake mix flavor?
While devil's food provides the deepest chocolate flavor, you can experiment with other chocolate cake mixes like German chocolate or fudge varieties. Avoid vanilla or yellow cake mixes as they won't provide the intense chocolate needed to balance the peanut butter richness.