 Save
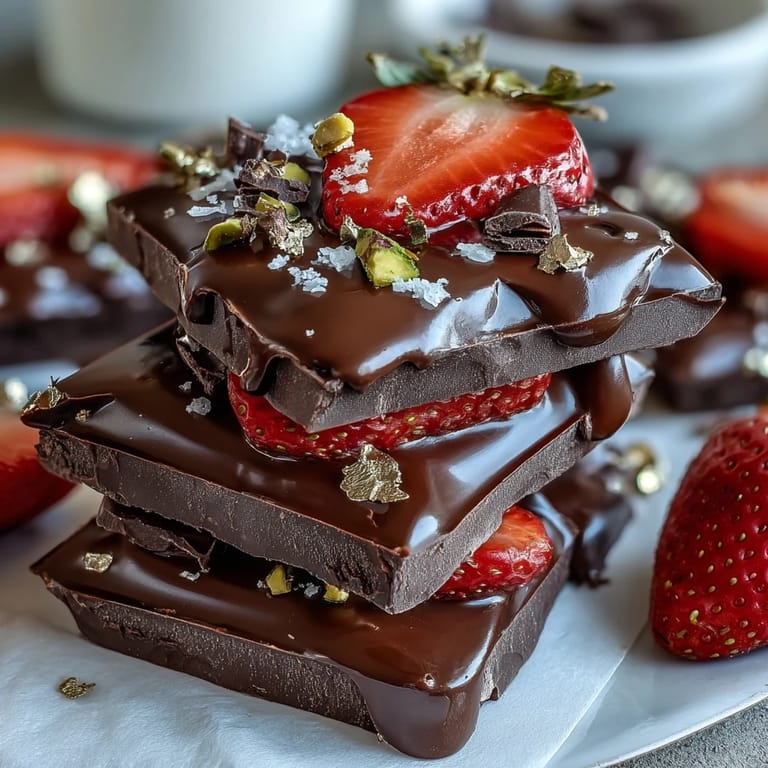
Save I stumbled onto this recipe while scrolling through my phone at midnight, mesmerized by videos of glossy chocolate slabs studded with ruby strawberries and gold leaf. What struck me most wasn't the luxury aesthetic—it was realizing I could actually make it in my tiny kitchen with barely any skill required. The first time I poured that dark chocolate onto parchment paper, my hands were shaking a little, not from nerves but from excitement that something this beautiful could come together without an oven or fancy equipment.
I made this for my sister's birthday dinner last spring, and watching her face when I pulled it from the fridge—that moment of pure delight before she even tasted it—made me understand why food that looks beautiful matters just as much as food that tastes good. She called it "too pretty to eat," but we managed anyway, standing in the kitchen with plates balanced on our palms like we were at some upscale dessert bar instead of a Tuesday night at home.
Ingredients
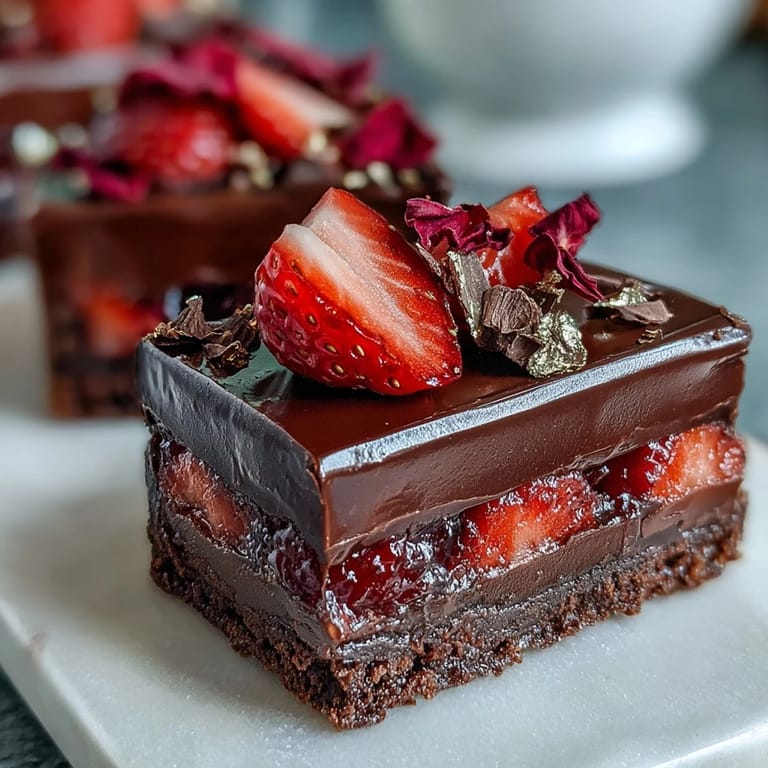
- Dark chocolate (200 g, at least 60% cocoa), chopped: The backbone of this bark—choose quality chocolate because you'll actually taste it, and those few extra dollars make a real difference in smoothness and richness.
- White chocolate (200 g), chopped: This creates the gorgeous marbled effect and adds sweetness that balances the dark chocolate's intensity.
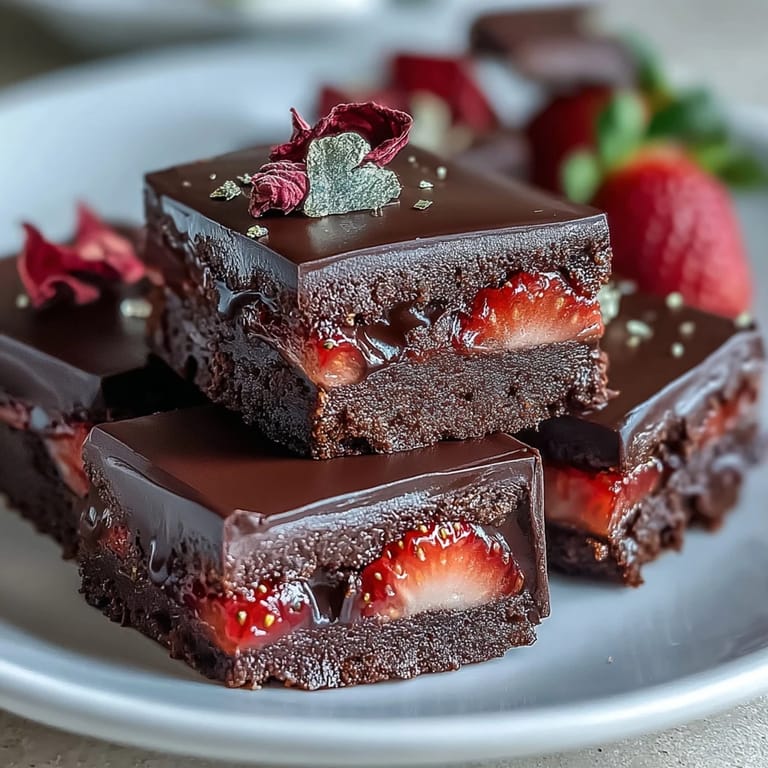
- Fresh strawberries (200 g), hulled and thinly sliced: Pat these dry before adding or they'll weep moisture onto your chocolate, which sounds dramatic but honestly ruins the texture.
- Pistachios (50 g), roughly chopped: Their buttery nuttiness and vibrant green color are non-negotiable for the final look and flavor.
- Dried edible rose petals (2 tbsp): These add an elegant floral note and are what push this from "homemade chocolate bark" into "Instagram-worthy masterpiece" territory.
- Freeze-dried strawberries (1 tbsp, optional): A secret weapon for texture contrast—they stay crispy while the fresh strawberries soften slightly as the chocolate cools.
- Edible gold leaf (1 tbsp, optional): Purely decorative, but if you're already making something this beautiful, the gold leaf is the final flourish that makes it unforgettable.
Tired of Takeout? 🥡
Get 10 meals you can make faster than delivery arrives. Seriously.
One email. No spam. Unsubscribe anytime.
Instructions
- Prepare your workspace:
- Line a large baking sheet with parchment paper and have all your toppings prepped and waiting nearby—you'll work quickly once chocolate hits the pan, so there's no time for scrambling.
- Melt the dark chocolate:
- Use a double boiler or microwave in 20-second bursts, stirring between each one to avoid seizing that beautiful chocolate into a grainy mess. When it's smooth and pourable, you're done—don't overheat it.
- Spread the dark chocolate base:
- Pour it onto your parchment and use a spatula to spread it into an even rectangle about 1/4-inch thick, working gently so you don't trap air bubbles. This is your canvas, so take a breath and make it as smooth as you can.
- Melt and marble the white chocolate:
- Once your dark layer is spread, melt the white chocolate using the same gentle method. Drizzle or dollop it over the dark chocolate in whatever pattern appeals to you, then use a skewer or toothpick to swirl them together for that gorgeous marbled effect.
- Top while chocolate is still soft:
- Working quickly but without rushing, scatter your sliced strawberries evenly across the surface, then sprinkle the pistachios, rose petals, and freeze-dried strawberries on top. If you're using gold leaf, gently press tiny pieces onto the chocolate now while it's still tacky.
- Chill until completely set:
- Refrigerate for at least 45 minutes—I know it's tempting to peek, but patience here ensures your chocolate snaps cleanly when you break it into shards instead of bending or cracking messily.
- Break and store:
- Once set solid, break the bark into irregular shards with your hands or cut it into neat pieces with a sharp knife, depending on the vibe you're going for. Store everything in an airtight container in the fridge for up to three days.
 Pin it
 There's something almost meditative about watching chocolate melt, seeing it go from choppy chunks to glossy liquid silk. The first time I added the rose petals, I wasn't sure if they'd look sophisticated or just odd, but when everything came together and I pulled that tray from the fridge, I finally understood why people get excited about food that's worth photographing.
The Art of Chocolate Tempering Without Fuss
You don't need to temper chocolate for this recipe—one of the reasons it's so approachable—but understanding why melting matters helps you succeed. When chocolate gets too hot, the cocoa butter separates and you lose that snap and shine, so gentle, low heat is your friend. The double boiler method feels slow but it prevents overheating, and honestly, watching the steam rise while you stir is where half the enjoyment lives.
Strawberry Selection and Prep
Not all strawberries are created equal, and I learned this the hard way by using huge, watery ones that turned into puddles on my first attempt. Medium-sized strawberries with firm flesh work best, and slicing them thin means they stick to the chocolate rather than sliding around like tiny red hockey pucks. I now buy strawberries the day I plan to make this and store them unwashed until the last minute, then pat each slice individually with paper towels like I'm being paid to do it.
Why This Bark Became My Go-To Gift
It looks like you spent money and time, tastes like pure indulgence, travels beautifully in a box, and honestly makes people feel special in a way simple desserts don't. I started making this for friends' birthdays, dinner party hosts, and even a few coworkers who needed cheering up, and every single time the response was that stunned silence followed by genuine delight. It's the kind of thing that makes you feel generous for giving it but also secretly happy you get to keep some for yourself.
- Make extra gold leaf visible on top for maximum wow-factor when you're gifting this.
- Wrap individual shards in cellophane and tie with twine for presentation that feels thoughtful without being fussy.
- Write a little note about how to store it cold—people often don't realize this needs refrigeration to stay perfect.
 Pin it
 This bark proved to me that the most impressive desserts don't require technical skill—just decent ingredients, a little patience, and the willingness to try something that looks complicated but really isn't. Make it once and you'll understand why it went viral.
Frequently Asked Questions
- → How do I melt the chocolates without burning?
Use a double boiler or microwave in short bursts, stirring frequently to ensure smooth, melted chocolate without burning.
- → Can I substitute pistachios with other nuts?
Yes, almonds or hazelnuts work well as alternatives, offering different textures and flavors.
- → What is the best way to prevent moisture on strawberries?
Dry strawberries thoroughly before placing them on the chocolate to avoid sogginess and maintain crisp texture.
- → How long should this chocolate bark chill before serving?
Refrigerate for at least 45 minutes until completely set for easy cutting and serving.
- → How should the bark be stored to keep freshness?
Store in an airtight container in the refrigerator for up to three days to preserve texture and flavor.