 Save
Save Golden crispy baked chicken tenders deliver family comfort with a lighter touch and no deep frying or oil splatter. The result is chicken that stays juicy yet turns out impossibly crunchy all over using clever oven tricks and simple ingredients. These tenders work as a quick dinner, game-day snack, or lunchbox hero.
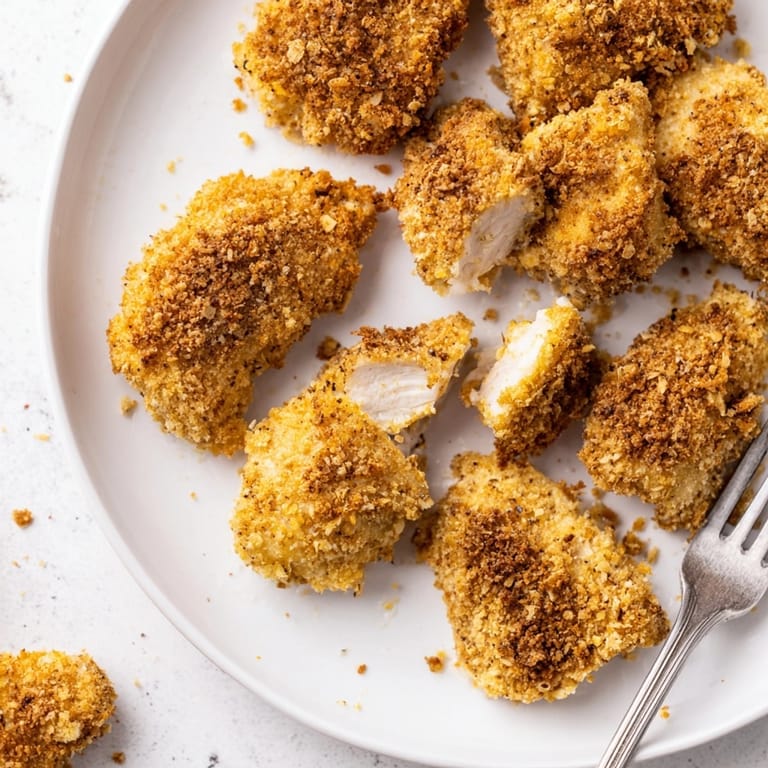
When I first tested baking chicken tenders, I was blown away by how crunchy the cornflake and panko combo turned out. Now, we make these for movie nights and any time we need comfort food that still feels wholesome.
Ingredients
- Chicken tenders or boneless skinless chicken breasts cut into strips: Choose the freshest poultry you can find Look for chicken that is plump with no gray spots or unpleasant smell
- Panko breadcrumbs: These light Japanese-style crumbs stay extra crispy in the oven Pick them up in the Asian section of most supermarkets
- Cornflakes crushed: This classic cereal brings incredible crunch Use plain unsweetened flakes for best results
- Garlic powder for savory flavor: Layered seasoning helps wake up baked breading
- Paprika adds a gentle smoky warmth: Smoked paprika takes it up a notch if you have it
- Salt and black pepper for balance: Freshly cracked pepper bumps up flavor
- Eggs plus a splash of milk for dredging: Use large eggs at room temperature if possible
- Olive oil spray or a drizzle of olive oil: A light mist helps brown and crisp everything up
Tired of Takeout? 🥡
Get 10 meals you can make faster than delivery arrives. Seriously.
One email. No spam. Unsubscribe anytime.
Instructions
- Prepare the Oven:
- Preheat to 425 degrees Fahrenheit and line a large baking sheet with parchment or lightly grease it so the tenders will not stick
- Mix the Breading:
- Combine panko breadcrumbs cornflakes garlic powder paprika salt and pepper in a shallow bowl Stir well making sure the seasonings are evenly distributed
- Blend the Dredge:
- Whisk eggs and milk in a separate shallow bowl until smooth This is your glue for the crispy coating
- Dry and Prep the Chicken:
- Pat the chicken strips dry with paper towels This step helps the coating cling and ensures maximum crunch
- Coat the Chicken:
- Dip each strip fully in egg mixture then press all sides into the breadcrumb mixture Gently press to make sure plenty sticks Every nook and cranny should be covered
- Arrange and Oil:
- Lay all coated strips on the prepared baking sheet in a single layer Spray or drizzle lightly with olive oil This step guarantees even browning and a satisfying snap
- Bake to Perfection:
- Slide the tray into the hot oven and bake for 18 to 20 minutes Flip the tenders halfway through and bake until the coating is evenly golden and the chicken inside is cooked through at least 165 degrees Fahrenheit
- Rest and Serve:
- Remove from the oven and let the tenders sit a few minutes so the juices settle and they do not steam themselves soft Serve while crisp and hot
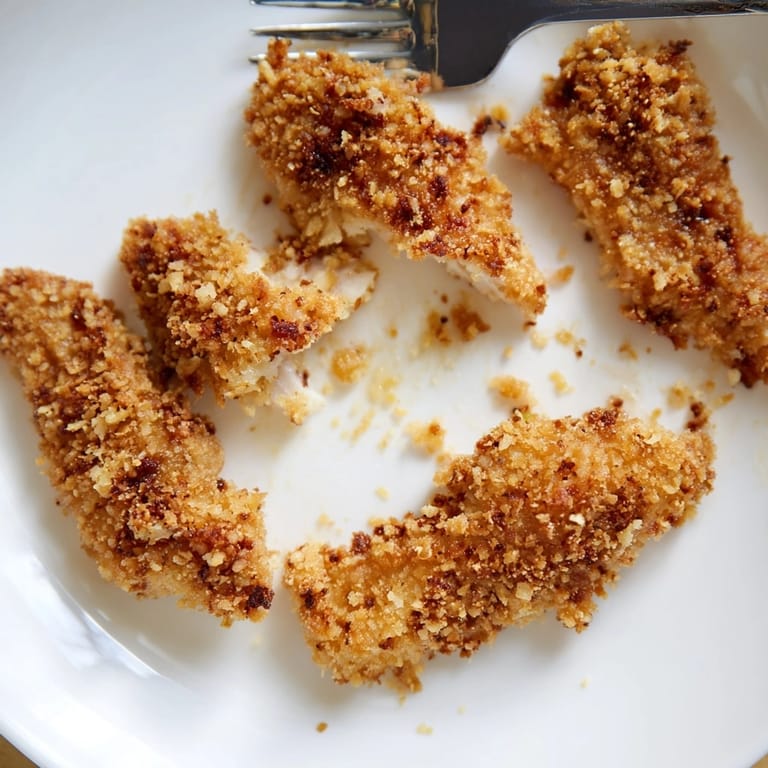
 Pin it
 My favorite part has to be dipping the piping hot tenders in honey mustard and seeing everyone reach for seconds. Once my niece declared these the best chicken ever and we have made them nonstop since.
Storage Tips
Let leftovers cool completely before storing in an airtight container They keep crisp in the refrigerator for two days For best results reheat in a hot oven or air fryer which brings back their golden crust in just a few minutes Avoid microwaving as it softens the coating
Ingredient Substitutions
No panko Swap in regular breadcrumbs but expect slightly less crunch Gluten free breadcrumb and cornflake varieties work beautifully as well If you need dairy free simply use water in place of milk in the dredge You can also experiment with seasonings like chipotle or Italian herbs for different flavor spins
Serving Suggestions
I love piling crispy tenders on a platter with little bowls of dipping sauces Try ranch ketchup barbecue or sweet chili You can even tuck them into wraps or slice for salads For a classic American touch serve alongside mashed potatoes and green beans
Cultural and Historical Context
Chicken fingers took off in the United States in the eighties as a family-friendly restaurant staple This homemade baked method transforms what was once deep-fried fare into something decidedly modern and nourishing You get the nostalgia without the mess or heaviness
Seasonal Adaptations
In summer serve tenders cold in picnic sandwiches or cut into salads For a cozy winter plate pair with roasted vegetables and garlic bread Springtime is perfect for tucking them into fresh pita wraps loaded with greens
Success Stories
Countless friends have texted me photos of golden tenders from their own kitchens after trying this recipe Always the same feedback Super crispy no greasy coating This is a go-to weeknight dinner for anyone with hungry kids or a busy calendar
Freezer Meal Conversion
To freeze arrange fully baked but cooled tenders on a tray and freeze solid Then transfer to a zip bag or freezer box They can be reheated straight from frozen in a hot oven for about ten minutes This trick has saved me on many rushed nights and even school lunches
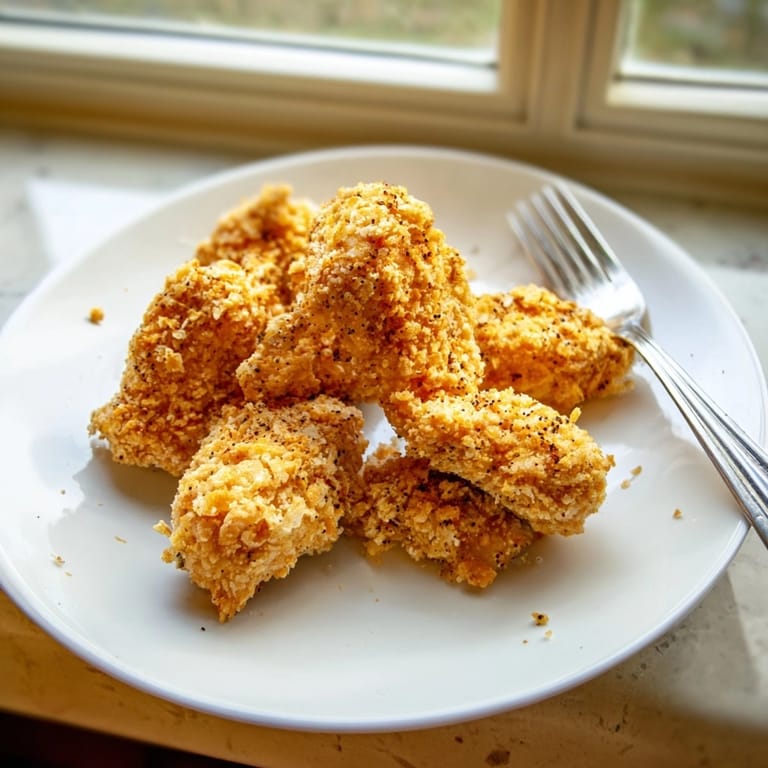
 Pin it
 Bake up these chicken tenders for guaranteed smiles at your table. Their irresistible crunch and simple prep will have you returning to this recipe time after time.
Frequently Asked Questions
- → How do you achieve a crispy coating?
Using panko breadcrumbs and crushed cornflakes creates a crunchy outer layer, while baking at high heat ensures a crisp finish.
- → Can I prepare these in advance?
Yes, you can bread the chicken strips and refrigerate them for up to 4 hours before baking for added convenience.
- → Are these tenders suitable for gluten-free diets?
Absolutely—just substitute gluten-free breadcrumbs and cornflakes for a gluten-free version.
- → What dipping sauces pair well?
Try honey mustard, ranch, or ketchup for classic, kid-friendly options.
- → How do you know when they're done?
Bake until golden brown and the internal temperature of the chicken reaches 165°F (74°C).