 Save
Save My daughter came home from school one afternoon with a crumpled permission slip for a field trip, and I realized I had exactly zero inspiration for her lunch box. She'd outgrown the usual sandwich routine, and I wanted something that wouldn't get soggy by noon. That's when these rainbow wraps were born—a happy accident of wanting to use up the vegetables in my crisper drawer while making her smile at the cafeteria table.
I'll never forget watching her open that lunch box at pickup time, holding it up to show her friends the layers of red, yellow, orange, and purple peeking through the tortilla. She asked if I could make them again the next week, and somehow it became our Thursday tradition. Now she helps me slice the vegetables, and we race to see who can arrange them fastest.
Ingredients
- Large whole wheat tortillas (4): These hold up better than regular flour tortillas and taste almost nutty when you bite through all the filling—look for ones that are actually flexible, not the ones that crack when you unfold them.
- Hummus (4 tbsp): This acts as your glue and flavor base, so don't skip spreading it all the way to the edges or parts of your wrap will taste bland.
- Red bell pepper (1 medium, thinly sliced): The sweetness balances out the earthiness of everything else, and those thin slices make rolling so much easier than chunky cuts.
- Yellow bell pepper (1 medium, thinly sliced): Besides adding brightness, yellow peppers are slightly milder than red ones, which my picky eaters actually noticed.
- Carrot (1 medium, julienned): Raw carrots add a satisfying crunch that survives the journey in a lunch box—peel them first to remove any bitter outer layer.
- Cucumber (1 small, julienned): This keeps everything fresh-tasting, but remove the seeds if your cucumber is watery or your wraps will get soggy by lunchtime.
- Purple cabbage (1 cup, shredded): It's secretly the MVP—stays crunchy all day and its color doesn't fade like other vegetables do.
- Baby spinach leaves (1 cup): These wilt slightly into the hummus, making them less noticeable to vegetable resisters while still packing nutrition.
- Fresh parsley or cilantro (1/4 cup, chopped, optional): A small handful transforms these from good to memorable, adding brightness that makes everything taste fresher.
- Avocado (1, sliced, optional): If you're using this, slice it right before assembly or it'll brown and look unappetizing.
- Crumbled feta cheese (4 tbsp, optional): The salty tang cuts through all the fresh vegetables and makes even the pickiest eater feel like they're eating something fancy.
Tired of Takeout? 🥡
Get 10 meals you can make faster than delivery arrives. Seriously.
One email. No spam. Unsubscribe anytime.
Instructions
- Set Up Your Station:
- Lay your tortilla flat on a clean, dry surface and take a moment to admire it—this is important because wet surfaces will make your tortilla stick and tear. Have all your prepped vegetables within arm's reach so you're not hunting for them mid-assembly.
- Spread the Hummus Base:
- Dollop about a tablespoon of hummus onto the center of your tortilla and use the back of a spoon to spread it in a thin, even layer, leaving about a half-inch border on all sides. If you go all the way to the edge, the hummus will squeeze out when you roll, which I learned the hard and messy way.
- Create Your Rainbow:
- Arrange your vegetables in distinct horizontal rows across the center—red peppers, then yellow, then carrot, cucumber, and purple cabbage. This isn't just for looks; it ensures every bite has a balanced combination of flavors and textures, not just carrot in one section.
- Add Your Finishing Touches:
- Sprinkle your herbs, avocado slices, and feta cheese over the top of your rainbow, being generous but not so excessive that they'll fall out. This is where personality comes in, so adjust based on what you love and what your lunch box companion actually enjoys.
- The Perfect Roll:
- Fold the two long sides of the tortilla inward about an inch, then starting from the bottom edge closest to you, roll tightly and firmly upward like you're wrapping a present. The side folds trap the filling and keep it from falling out the ends, which is the secret to wraps that actually hold together.
- Slice and Wrap:
- Cut each wrap diagonally with a sharp knife (diagonals always look more appealing than straight cuts), then wrap each piece tightly in parchment paper or foil. The parchment lets you grab it without it unraveling, and it keeps everything fresh for hours.
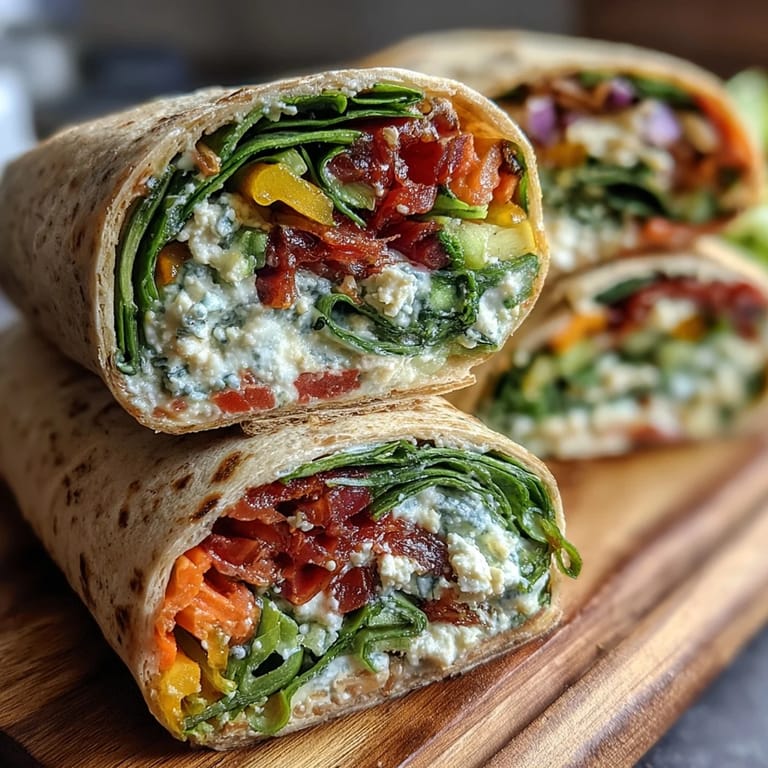
 Pin it
 There's something almost meditative about slicing vegetables into perfect ribbons and watching them transform into something colorful enough to make anyone hungry. When my daughter's friend asked for the recipe after tasting one at lunch, I realized these wraps had crossed from just being practical into being genuinely loved.
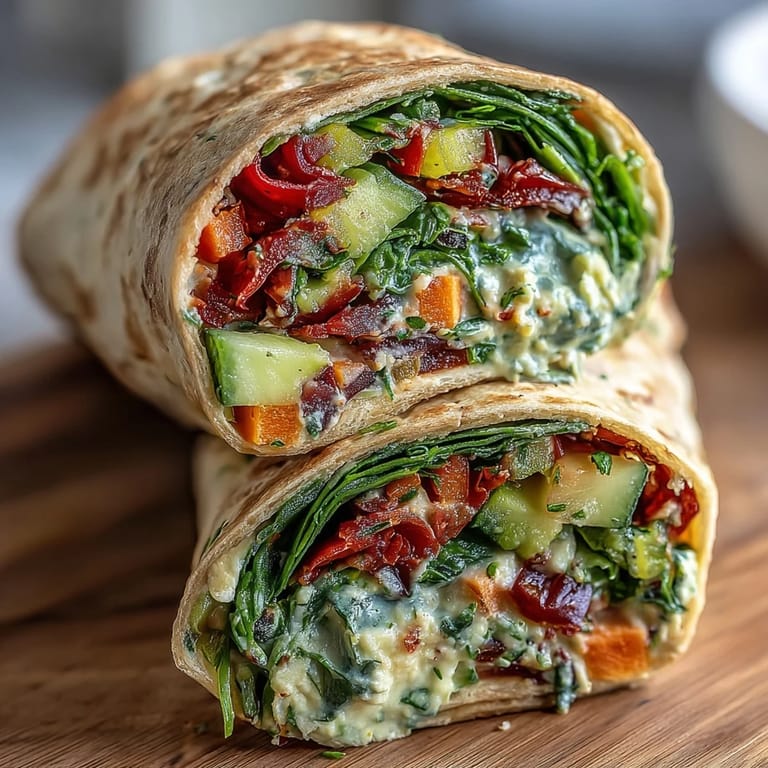
Building Flavor Layers
The secret to these wraps tasting like more than just vegetables is layering your flavors intentionally. The hummus provides that creamy, slightly garlicky base that holds everything together, while the raw vegetables bring brightness and crunch. If you add feta, it creates a salty-tangy contrast that makes your taste buds wake up, and even just a tiny pinch of fresh herbs elevates it from lunch-box ordinary to something you'd actually order at a cafe. Think about it less as assembling ingredients and more as conducting a flavor symphony.
Storage and Timing Tips
I've made these wraps the night before and they've held up beautifully, or prepped all the vegetables in the morning and assembled them just before packing—both work, but the assembly-while-packing method keeps them the crispest. If you're packing these for later, skip the avocado unless you're adding it right before eating, since it browns faster than everything else. Wrapping them tightly in parchment paper or foil is the key to keeping them from drying out or falling apart during transport.
Mix-ins and Swaps to Try
Once you master the basic formula, these wraps become a canvas for whatever you have on hand or whatever you're in the mood for. I've added grilled chicken for extra protein on days when my daughter had sports after school, swapped the hummus for creamy avocado spread when we were out of hummus, and even tried a Middle Eastern version with tabbouleh mixed into the hummus base. The versatility is part of what makes these so useful—you're not locked into one version.
- Crumbled goat cheese works beautifully instead of feta and has a tangier personality.
- A thin smear of pesto under the hummus adds an herby richness that changes the whole vibe.
- Roasted chickpeas sprinkled on top add crunch and extra plant-based protein for hungry eaters.
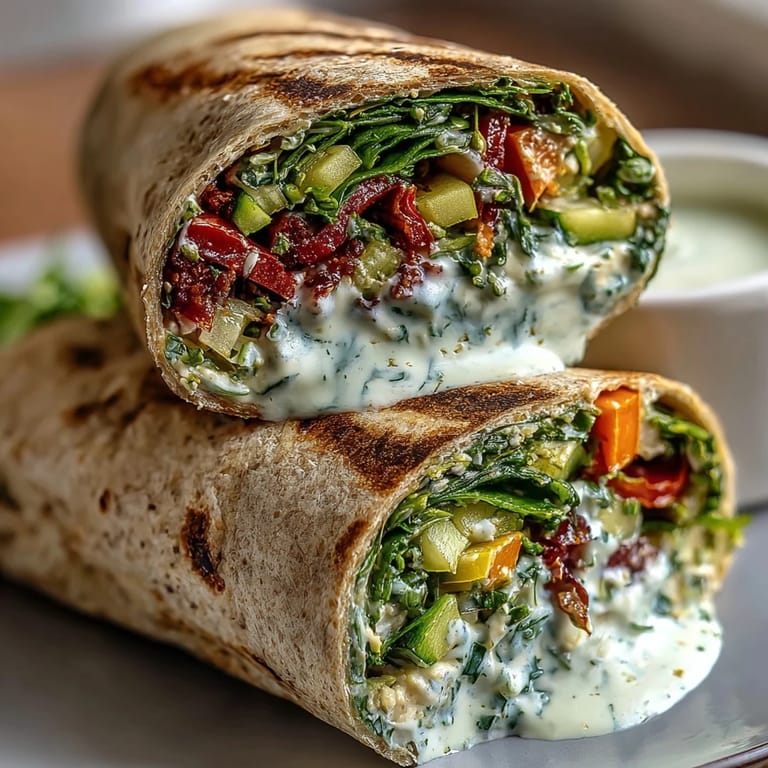 Pin it
 These wraps have become my answer to the eternal question of what to pack for lunch—nutritious enough that I feel good about it, tasty enough that they actually get eaten, and beautiful enough that they spark joy when you unwrap them. There's real magic in feeding people something they genuinely look forward to eating.
Frequently Asked Questions
- → What vegetables are used in the wraps?
The wraps feature red and yellow bell peppers, carrot, cucumber, purple cabbage, baby spinach, and optional fresh herbs like parsley or cilantro.
- → Can I substitute the spread used on the tortilla?
Yes, hummus can be replaced with cream cheese or dairy-free spreads depending on preference or dietary needs.
- → Are there protein options for these wraps?
You can add grilled chicken or tofu for extra protein, making the wraps more filling.
- → How do I keep the wraps fresh during transport?
Wrap them tightly in parchment paper or foil to maintain freshness and make them easy to carry.
- → Can these wraps be made gluten-free?
Yes, use gluten-free tortillas to accommodate gluten-sensitive diets.
- → What kitchen tools are needed?
A cutting board, sharp knife, vegetable peeler for the carrots, and a spatula or spoon for spreading the hummus are all recommended.