 Save
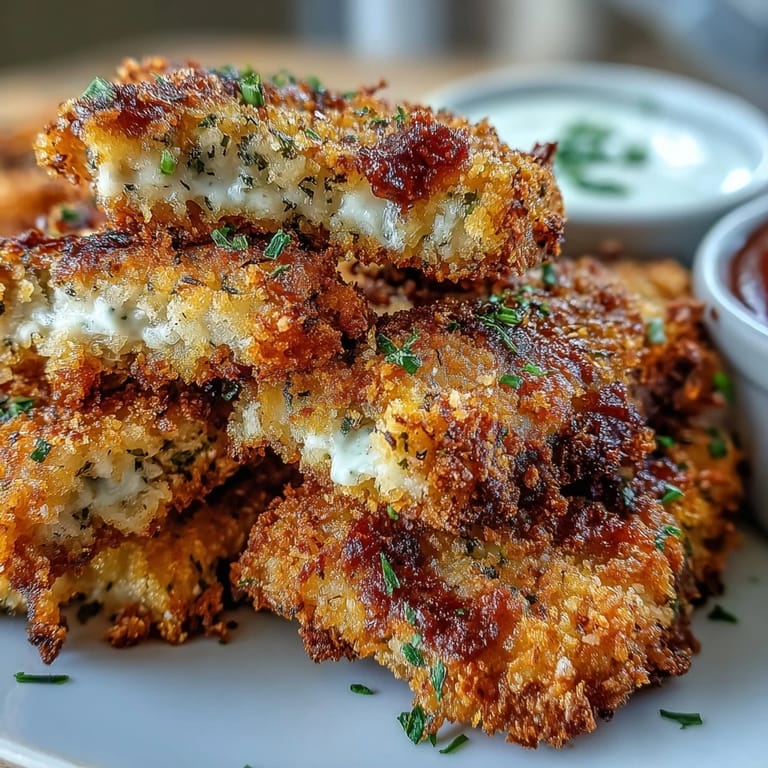
Save My kids discovered these by accident one Tuesday when I was trying to use up chicken breasts and a half-empty container of panko. They watched me slice the chicken into strips, asked if we were making fries, and suddenly the whole operation became a competition to see who could dip and coat faster. Twenty-five minutes later, when those golden sticks came out of the oven, nobody could believe they were baked, not fried. That night taught me something simple: the best dishes often come from happy mistakes and eager helpers at the counter.
I brought these to a potluck last spring, packed in a container with the marinara in a small jar, and watched them disappear within minutes. Someone asked for the recipe, then another person, then three more. What struck me was how people kept saying these tasted like their favorite chicken strip dinners from childhood, but better, because they knew exactly what was inside them.
Ingredients
- Boneless, skinless chicken breasts (500 g): Buy the thickest ones you can find, then pound them slightly before slicing so every strip cooks evenly.
- All-purpose flour (1/2 cup): This first layer helps the egg wash stick, so don't skip it even though it seems redundant.
- Eggs and milk (2 large eggs, 1 tbsp milk): The milk thins the egg slightly, making it easier to coat without clumps.
- Panko breadcrumbs (1 cup): The larger flakes create that restaurant-quality crunch that regular breadcrumbs just can't match.
- Grated Parmesan cheese (1/2 cup): Use freshly grated if possible, as the pre-shredded kind sometimes has anticaking agents that dull the flavor.
- Garlic powder and Italian seasoning (1 tsp each): These live in the breading mixture where they toast slightly in the oven, amplifying their flavor.
- Cooking spray or olive oil: Either works, but a light drizzle of olive oil gives a slightly richer crust than spray alone.
- Marinara sauce and ranch dressing: Warm the marinara just before serving so the chicken stays hot longer when dipped.
Tired of Takeout? 🥡
Get 10 meals you can make faster than delivery arrives. Seriously.
One email. No spam. Unsubscribe anytime.
Instructions
- Heat your oven and prepare the stage:
- Crank the oven to 220°C (425°F) and line your baking sheet with parchment paper. A quick spray or drizzle of oil prevents sticking and helps the bottom get just as golden as the top.
- Slice the chicken into fries:
- Cut each breast lengthwise into strips about 1/2-inch wide. If your knife feels like it's dragging, sharpen it first, because clean cuts cook more evenly than ragged ones.
- Season and set up your breading station:
- Dust the strips with salt and pepper on both sides. Arrange three bowls in a line: flour in the first, beaten eggs mixed with milk in the second, and your panko-Parmesan mixture in the third.
- Coat each strip with intention:
- Dredge the chicken in flour, shake off the excess, dip it in egg until fully coated, then roll it through the panko mixture, pressing gently so the coating actually sticks. This might feel tedious, but it's exactly where the crunch comes from.
- Arrange and oil lightly:
- Lay the breaded strips in a single layer on your prepared sheet, leaving a tiny bit of space between each one. Spray or drizzle with a light touch of oil, because too much makes them greasy instead of crispy.
- Bake until golden and cooked through:
- Slide them into the oven for 20 to 25 minutes, flipping them halfway so both sides turn that beautiful golden brown. They're done when the internal temperature hits 74°C (165°F) and the coating sounds crispy when you tap it.
- Serve immediately while the magic is still there:
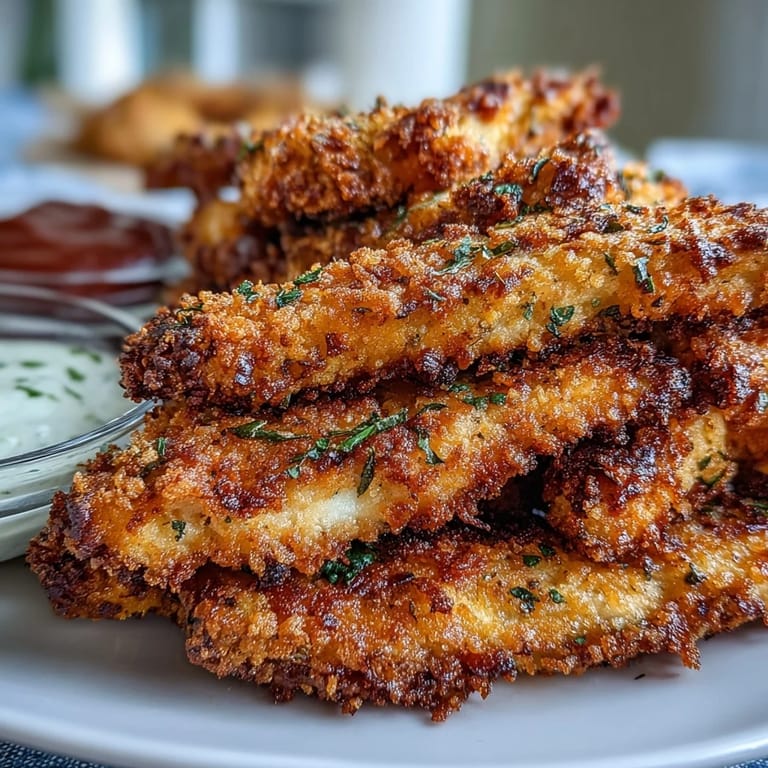
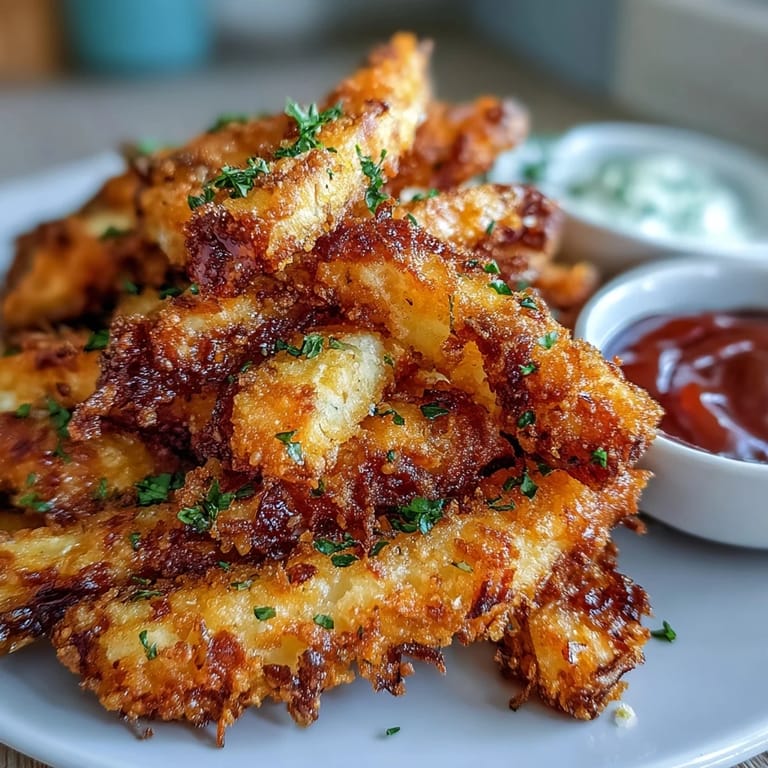
- Arrange them on a plate like fries, with warm marinara and cool ranch waiting on the side. The temperature contrast and the dipping ritual are part of why people love these.
 Pin it
 My partner once stayed late at work on a stressful day, and when he came home to find these waiting with a cold beer, he just sat quietly for a minute, eating them one by one. He didn't say much, but the way he relaxed told me everything. Sometimes the simplest food is exactly what someone needs.
The Secret to Maximum Crispiness
The difference between crispy and soggy comes down to three things happening at once: your oven temperature must actually be 220°C (425°F), not just close to it; the coating needs a light touch of oil before baking so the panko can crisp rather than steam; and the strips need space to breathe on the pan, not crowded together. I learned this after making a batch where I packed them too tightly, thinking I was being efficient, and half of them came out soft. The next time, I spread them out generously, and the transformation was immediate.
Why Panko Over Regular Breadcrumbs
Panko breadcrumbs are larger and fluffier than regular ones, which means they fry up crunchier and stay that way longer. I once made these with fine breadcrumbs because I forgot to buy panko, and while they tasted good, they turned dense and heavy. The panko version has an actual bite to it, that satisfying crunch that makes eating them fun instead of just necessary.
Customizing and Serving Ideas
The beautiful thing about these is how easily they adapt to what you're in the mood for. The marinara and ranch combo is classic, but you could also serve them with a squeeze of lemon, a dusting of fresh Parmesan, or even a drizzle of hot sauce if your crew likes heat. For a lighter dinner, serve them alongside a fresh green salad and you've got a balanced meal that feels special.
- Spice them up by stirring 1/4 teaspoon of chili flakes into the breadcrumb mixture for a subtle kick.
- Go gluten-free by using gluten-free panko and flour, and they'll turn out exactly the same texture.
- Make ahead by breading the strips up to 4 hours early, refrigerating them uncovered, then baking when you're ready to eat.
 Pin it
 These strips have become my go-to when I need something that feels indulgent but comes together quickly, and that's probably when they're most valuable. There's something satisfying about pulling them from the oven and knowing everyone at the table is about to be genuinely happy.
Frequently Asked Questions
- → Can I make these chicken strips ahead of time?
Yes, you can bread the chicken strips up to 4 hours before baking. Store them on a parchment-lined baking sheet in the refrigerator until ready to bake. Add an extra 2-3 minutes to the cooking time if baking cold from the refrigerator.
- → What's the best way to reheat leftover chicken fries?
Reheat in a 200°C (400°F) oven for 8-10 minutes until heated through and crispy again. Avoid microwaving as this will make the breading soggy. An air fryer at 190°C (375°F) for 4-5 minutes also works excellently for restoring crunch.
- → Can I fry these instead of baking?
Absolutely. Heat oil to 190°C (375°F) and fry for 3-4 minutes until golden brown and cooked through. Drain on paper towels to remove excess oil. The baking method was chosen for easier cleanup and less oil, but frying yields an even crunchier exterior.
- → What other dipping sauces work well?
Beyond marinara and ranch, try garlic aioli, honey mustard, spicy arrabbiata sauce, or even a lemon-herb yogurt dip. The mild, savory flavor of the chicken and Parmesan coating pairs well with both creamy and tangy condiments.
- → How do I know when the chicken is fully cooked?
The safest method is using a meat thermometer to check for an internal temperature of 74°C (165°F). Visual cues include golden brown breading on all sides and meat that feels firm when pressed. Cut into one strip to verify the meat is white throughout and opaque, not pink.
- → Can I freeze the uncooked breaded strips?
Yes, arrange breaded strips on a baking sheet and freeze until solid, about 2 hours. Transfer to a freezer bag and store for up to 3 months. Bake from frozen at 200°C (400°F) for 25-30 minutes, flipping once. No need to thaw first.